756 lines
No EOL
31 KiB
Markdown
756 lines
No EOL
31 KiB
Markdown
---
|
||
post_title: Payment method integration
|
||
sidebar_label: Payment method integration
|
||
|
||
---
|
||
|
||
# 付款方式集成
|
||
|
||
## 客户端集成
|
||
|
||
客户端集成包含用于注册_常规_和_快捷_付款方式的 API。
|
||
|
||
在这两种情况下,客户端集成都是通过 `blocks-registry` API 上公开的注册方法完成的。您可以通过 WooCommerce 环境中的 `wc` 全局变量访问此 API(`wc.wcBlocksRegistry`)。
|
||
|
||
> 注意:在构建过程中,您可以执行类似于区块仓库中所做的操作,[将此 API 作为外部依赖别名为 `@woocommerce/blocks-registry`](https://github.com/woocommerce/woocommerce-gutenberg-products-block/blob/e089ae17043fa525e8397d605f0f470959f2ae95/bin/webpack-helpers.js#L16-L35)。
|
||
|
||
## 快速支付方式
|
||
|
||
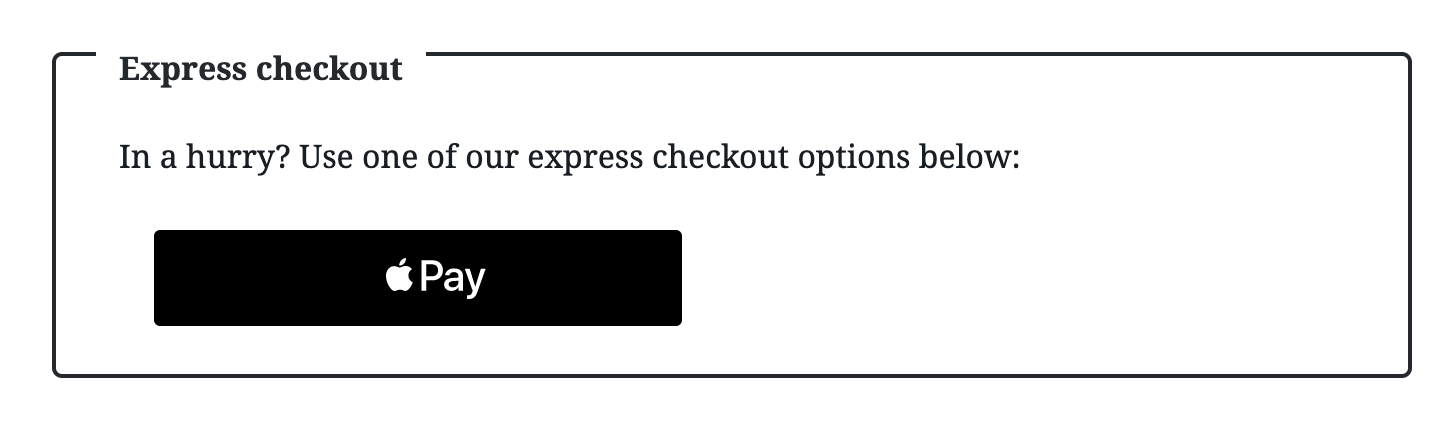
快速支付方式是指由购物者通过一键支付流程发起的支付方式,例如 Stripe、ApplePay 或 GooglePay。
|
||
|
||
|
||
|
||
### 注册
|
||
|
||
要注册一个快速支付方法,您需要使用区块注册表中的 `registerExpressPaymentMethod` 函数。
|
||
|
||
```js
|
||
const { registerExpressPaymentMethod } = window.wc.wcBlocksRegistry;
|
||
```
|
||
|
||
如果您为 `@woocommerce/blocks-registry` 使用了别名导入,可以像这样导入该函数:
|
||
|
||
```js
|
||
import { registerExpressPaymentMethod } from '@woocommerce/blocks-registry';
|
||
```
|
||
|
||
注册函数期望接收一个包含支付方法特定选项的 JavaScript 对象:
|
||
|
||
```js
|
||
registerExpressPaymentMethod( options );
|
||
```
|
||
|
||
您提供给配置实例的选项应是一个具有以下形状的对象(参见 `ExpressPaymentMethodConfiguration` 类型定义):
|
||
|
||
```js
|
||
const options = {
|
||
name: 'my_payment_method',
|
||
title: 'My Mayment Method',
|
||
description: 'A setence or two about your payment method',
|
||
gatewayId: 'gateway-id',
|
||
label: <ReactNode />,
|
||
content: <ReactNode />,
|
||
edit: <ReactNode />,
|
||
canMakePayment: () => true,
|
||
paymentMethodId: 'my_payment_method',
|
||
supports: {
|
||
features: [],
|
||
style: [],
|
||
},
|
||
};
|
||
```
|
||
|
||
#### `ExpressPaymentMethodConfiguration`
|
||
|
||
| 选项 | 类型 | 描述 | 必需 |
|
||
| --- | --- | --- | --- |
|
||
| `name` | 字符串 | 网关客户端的唯一标识符。 | 是 |
|
||
| `title` | 字符串 | 您的支付方式的人性化名称。在编辑器中向商家显示。 | 否 |
|
||
| `description` | 字符串 | 描述您的支付网关的简短文字(一到两句话)。在编辑器中向商家显示。 | 否 |
|
||
| `gatewayId` | 字符串 | 注册服务器端的支付网关的 ID。用于将商家引导到编辑器中的正确设置页面。如果未提供此 ID,商家将被重定向到 WooCommerce 的常规支付设置页面。 | 否 |
|
||
| `content` | ReactNode | 当在前端渲染块时,在快速支付方式区域输出的 React 节点。从结账支付方式界面接收 props。 | 是 |
|
||
| `edit` | ReactNode | 当在编辑器中渲染块时,在快速支付方式区域输出的 React 节点。从支付方式界面接收 props,用于预览数据。 | 是 |
|
||
| `canMakePayment` | 函数 | 回调函数,用于确定该支付方式是否应为用户可用。 | 是 |
|
||
| `paymentMethodId` | 字符串 | 伴随发送到服务器的结账处理请求的标识符。用于标识用于处理支付的支付方式网关类。 | 否 |
|
||
| `supports:features` | 数组 | 网关支持的支付功能的数组。用于检查该支付方式是否可用于购物车中的商品。如果未提供任何值,则默认为 `['products']`。 | 否 |
|
||
| `supports:style` | 数组 | 这是一个快速支付方式支持的样式变化数组。这些样式应用于所有活动的快速支付方式按钮,并且可以在编辑器中的快速支付方式块中进行控制。支持的值之一是 `['height', 'borderRadius']`。 | 否 |
|
||
|
||
#### `canMakePayment` 选项
|
||
|
||
`canMakePayment` 是一个回调函数,用于确定该付款方式是否应作为购物者的可用选项。该函数将接收一个包含当前订单数据的对象。
|
||
|
||
```ts
|
||
canMakePayment( {
|
||
cart: Cart,
|
||
cartTotals: CartTotals,
|
||
cartNeedsShipping: boolean,
|
||
shippingAddress: CartShippingAddress,
|
||
billingAddress: CartBillingAddress,
|
||
selectedShippingMethods: Record<string,unknown>,
|
||
paymentRequirements: string[],
|
||
} )
|
||
```
|
||
|
||
`canMakePayment` 返回一个布尔值。如果您的网关需要执行异步初始化来确定可用性,您可以返回一个 Promise(解析为布尔值)。这允许根据购物车隐藏付款方式,例如,如果购物车包含实体/可运输产品(示例:[`货到付款`](https://github.com/woocommerce/woocommerce-gutenberg-products-block/blob/e089ae17043fa525e8397d605f0f470959f2ae95/assets/js/payment-method-extensions/payment-methods/cod/index.js#L48-L70));或者允许付款方式根据其他条件控制其是否可用。
|
||
|
||
`canMakePayment` 仅在商店前端运行。在编辑上下文中,编辑器将假定付款方式可用(true),而不是使用 `canMakePayment`,以便向商家显示定义的 `edit` 组件。
|
||
|
||
**请注意,此函数可能在结账生命周期中被多次调用,因此在此属性上提供的回调函数中的任何昂贵逻辑都应进行记忆化处理。**
|
||
|
||
### 快速付款方式的按钮属性
|
||
|
||
此 API 提供了一种同步快速支付按钮外观的方法,以实现一致的购物者体验。快速付款方式必须优先使用 `buttonAttributes` 中提供的值,并在按钮在购物车或结账区块之外渲染时,使用自身的配置设置作为备份。
|
||
|
||
例如,在您的按钮组件中,您需要执行类似以下操作:
|
||
|
||
```js
|
||
// 获取您的扩展特定设置,并在不可用时设置默认值
|
||
let {
|
||
borderRadius = '4',
|
||
height = '48',
|
||
} = getButtonSettingsFromConfig();
|
||
|
||
// 在购物车和结账区块上下文中,我们会收到 `buttonAttributes` 作为属性,它会覆盖扩展特定设置
|
||
if ( typeof buttonAttributes !== 'undefined' ) {
|
||
height = buttonAttributes.height;
|
||
borderRadius = buttonAttributes.borderRadius;
|
||
}
|
||
...
|
||
|
||
return <button style={height: `${height}px`, borderRadius: `${borderRadius}px`} />
|
||
```
|
||
|
||
## 付款方式
|
||
|
||
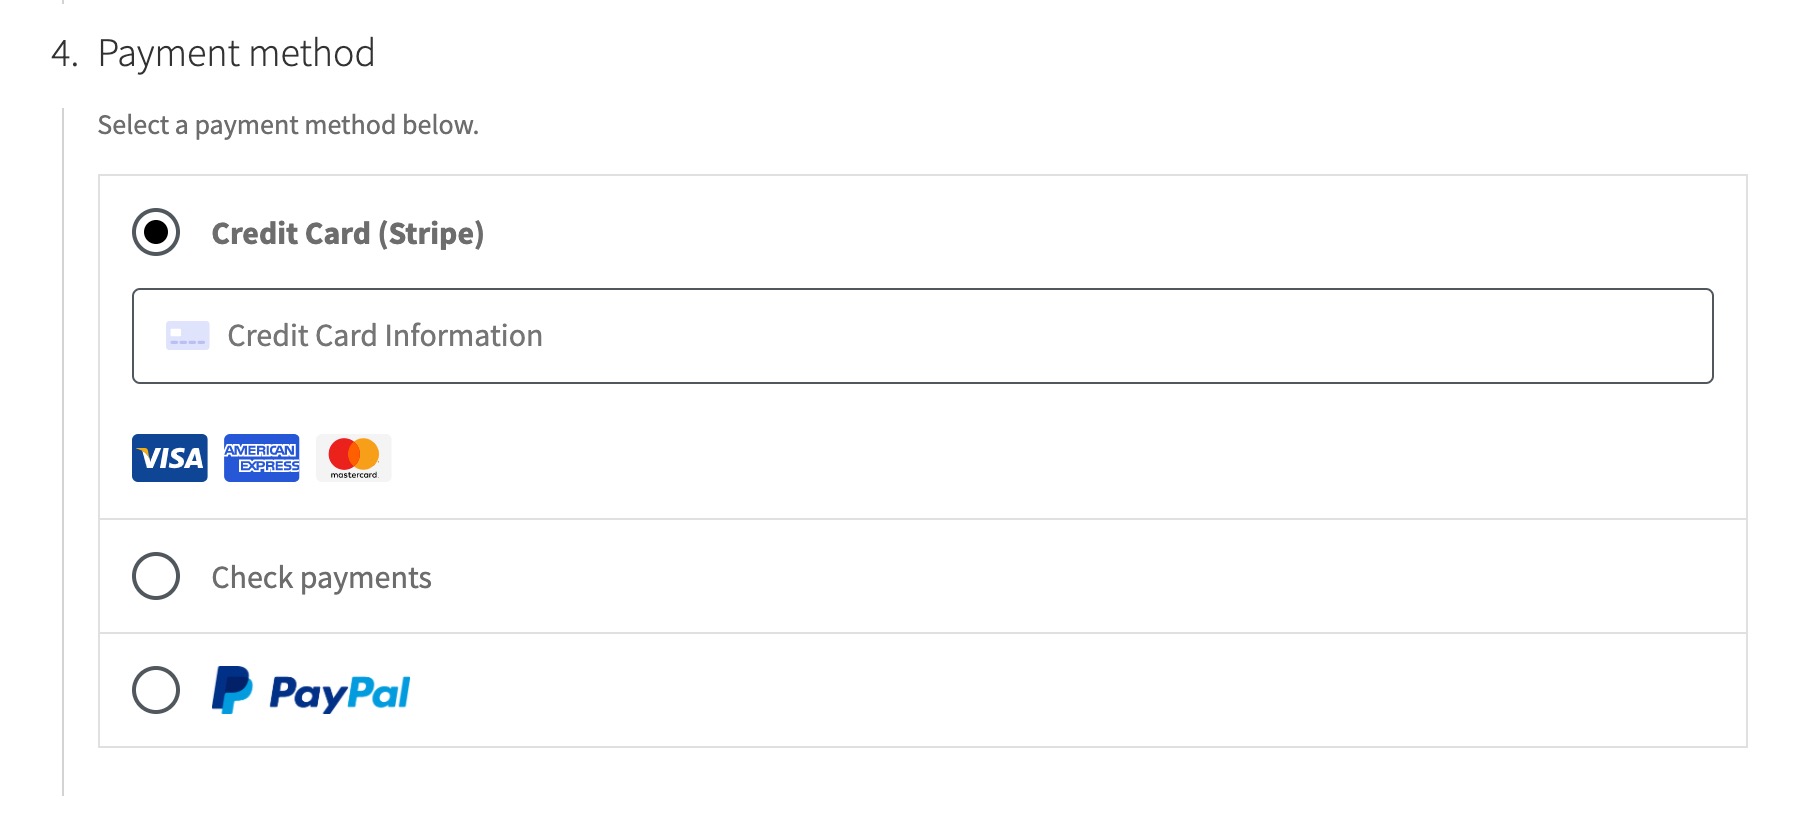
付款方式是在结账区块中显示的支付方法选项。示例包括_支票_、PayPal 标准和 Stripe 信用卡。
|
||
|
||
|
||
|
||
### 注册
|
||
|
||
要注册一种付款方式,您可以使用 `registerPaymentMethod` 函数,该函数位于 blocks 注册表中。
|
||
|
||
```js
|
||
const { registerPaymentMethod } = window.wc.wcBlocksRegistry;
|
||
```
|
||
|
||
如果您使用别名导入 `@woocommerce/blocks-registry`,则可以这样导入该函数:
|
||
|
||
```js
|
||
import { registerPaymentMethod } from '@woocommerce/blocks-registry';
|
||
```
|
||
|
||
注册函数期望一个包含特定于付款方式的选项的 JavaScript 对象:
|
||
|
||
```js
|
||
registerPaymentMethod( options );
|
||
```
|
||
|
||
您传递给配置实例的选项应该是一个具有以下结构的 对象(请参阅 `PaymentMethodRegistrationOptions` 类型定义)。 您传递给配置实例的选项与用于快速付款方式的选项相同,但增加了以下内容:
|
||
|
||
| 属性 | 类型 | 描述 |
|
||
| --- | --- | --- |
|
||
| `savedTokenComponent` | ReactNode | 一个 React 节点,包含处理已保存付款方式的逻辑。 当客户选择此付款方式的已保存令牌时,会进行渲染。 |
|
||
| `label` | ReactNode | 一个用于输出付款方式选项标签的 React 节点。 它可以是文本或图像。 |
|
||
| `ariaLabel` | string | 当选择付款方式时,屏幕阅读器读取的标签。 |
|
||
| `placeOrderButtonLabel` | string | 可选标签,用于更改当选择此付款方式时,默认的“提交订单”按钮的文本。 与 `placeOrderButton` 互斥。 |
|
||
| `placeOrderButton` | React Component | 可选的 React 组件,用于替换当选择此付款方式时,默认的“提交订单”按钮。 与 `placeOrderButtonLabel` 互斥。 该组件接收 `PaymentMethodInterface` 属性。 |
|
||
| `supports` | object | 包含关于支持功能的的信息: |
|
||
| `supports.showSavedCards` | boolean | 确定是否向客户显示此付款方式的已保存卡片。 |
|
||
| `supports.showSaveOption` | boolean | 控制是否显示用于将付款方式保存以供将来使用的复选框。 |
|
||
|
||
### 使用自定义“提交订单”按钮
|
||
|
||
`placeOrderButton` 属性允许您用自定义组件替换默认的“提交订单”按钮。这对于需要自定义按钮样式的付款方式(例如,Google Pay、Apple Pay)或需要在提交订单之前显示付款界面的情况非常有用。如果您的付款方式不需要此功能,建议省略此属性并使用默认按钮。
|
||
|
||
您的自定义按钮组件会接收与付款方式 `content` 组件相同的属性,并通过 `PaymentMethodInterface` 传递,此外还包含一些与按钮相关的附加属性:
|
||
|
||
- `waitingForProcessing` - 是否正在处理结账过程。
|
||
- `waitingForRedirect` - 是否正在等待成功后进行重定向。
|
||
- `disabled` - 是否应禁用按钮。
|
||
- `isEditor` - 按钮是否正在块编辑器中渲染。
|
||
- `isPreview` - 按钮是否正在预览模式下渲染。
|
||
|
||
以下是一个简单的示例:
|
||
|
||
```js
|
||
const CustomButton = ( props ) => {
|
||
const { validate, onSubmit, disabled, isEditor, isPreview, eventRegistration: { onPaymentSetup }, emitResponse } = props;
|
||
|
||
const [
|
||
isShowingInternalPaymentSheet,
|
||
setIsShowingInternalPaymentSheet,
|
||
] = React.useState( false );
|
||
|
||
const paymentResultRef = React.useRef( false );
|
||
|
||
const handleClick = async () => {
|
||
// 1. 验证结账表单
|
||
const validationResult = await validate();
|
||
|
||
if ( validationResult.hasError ) {
|
||
return; // WooCommerce 会自动显示验证错误
|
||
}
|
||
|
||
// 2. 显示您的付款界面(例如,Google Pay 界面、Apple Pay 界面)
|
||
// setIsShowingInternalPaymentSheet( true );
|
||
// const paymentResult = await showPaymentSheet( billing.cartTotal.value );
|
||
// paymentResultRef.current = paymentResult.success;
|
||
// if ( ! paymentResult.success ) {
|
||
// setIsShowingInternalPaymentSheet( false );
|
||
// return;
|
||
// }
|
||
|
||
// 3. 在收集到所有付款信息后,将结账提交到服务器。
|
||
onSubmit();
|
||
};
|
||
|
||
React.useEffect(
|
||
() =>
|
||
onPaymentSetup( () => {
|
||
return ({
|
||
type: paymentResultRef.current ? emitResponse.responseTypes.SUCCESS : emitResponse.responseTypes.ERROR,
|
||
meta: {
|
||
paymentMethodData: {
|
||
payment_method: 'your-payment-method',
|
||
},
|
||
},
|
||
});
|
||
} ),
|
||
[ onPaymentSetup, emitResponse.responseTypes.SUCCESS, emitResponse.responseTypes.ERROR ]
|
||
);
|
||
|
||
// 在编辑器/预览模式下,显示一个占位符或预览版本
|
||
if ( isEditor || isPreview ) {
|
||
return (
|
||
<button type="button" disabled>
|
||
使用自定义方式支付 (预览)
|
||
</button>
|
||
);
|
||
}
|
||
|
||
return (
|
||
<button
|
||
type="button"
|
||
onClick={ handleClick }
|
||
disabled={ disabled || isShowingInternalPaymentSheet }
|
||
>
|
||
{ disabled || isShowingInternalPaymentSheet
|
||
? '处理中...'
|
||
: '使用自定义方式支付' }
|
||
</button>
|
||
);
|
||
};
|
||
```
|
||
|
||
```
|
||
**注册自定义付款方式**
|
||
|
||
本指南介绍了如何注册自定义付款方式。
|
||
|
||
**内容:**
|
||
|
||
* **产品:** 自定义付款方式
|
||
* **选择:** 注册自定义付款方式
|
||
* **按钮:** 注册按钮
|
||
* **方法:** `registerPaymentMethod`
|
||
* **标签:** 付款方式标签
|
||
* **订单:** 订单
|
||
* **编辑:** 编辑按钮
|
||
* **保存:** 保存按钮
|
||
* **显示:** 显示区域
|
||
* **列表:** 付款方式列表
|
||
* **端口:** 无
|
||
* **使用:** 使用指南
|
||
* **在:** 在页面中
|
||
* **否:** 否
|
||
* **付款方式:** 付款方式
|
||
* **描述:** 描述信息
|
||
* **下单:** 下单按钮
|
||
* **已选中:** 已选择状态
|
||
|
||
```javascript
|
||
registerPaymentMethod( {
|
||
name: 'my-custom-payment',
|
||
label: <div>我的自定义付款方式</div>,
|
||
content: <div>付款方式描述</div>,
|
||
edit: <div>付款方式描述</div>,
|
||
placeOrderButton: CustomButton,
|
||
canMakePayment: () => true,
|
||
supports: {
|
||
features: [ 'products' ],
|
||
},
|
||
} );
|
||
```
|
||
|
||
**注意:** 自定义按钮仅在从列表中选择付款方式时才会显示。 当选择已保存的付款凭证时,将使用默认的“下单”按钮。
|
||
|
||
## 传递给付款方式节点的属性
|
||
|
||
付款方式集成的一个重要部分是,当提供的节点被克隆并在区块挂载时渲染时,会通过属性向付款方式暴露的界面。虽然所有属性都列在下面,但您可以在 [此文件中描述的类型定义](https://github.com/woocommerce/woocommerce/blob/trunk/plugins/woocommerce-blocks/assets/js/types/type-defs/payment-method-interface.ts) 中找到有关这些属性引用的对象、它们的类型等的更多详情。
|
||
|
||
# 属性说明
|
||
|
||
| Property | Type | Description |
|
||
| --- | --- | --- |
|
||
| `activePaymentMethod` | String | 当前结账流程中活动的付款方式的别名。 |
|
||
| `billing` | 包含 `billingAddress`, `cartTotal`, `currency`, `cartTotalItems`, `displayPricesIncludingTax`, `appliedCoupons`, `customerId` 属性的对象 | 包含所有与账单相关的信息。 |
|
||
| `cartData` | 包含 `cartItems`, `cartFees`, `extensions` 属性的对象 | 暴露的购物车数据,包括商品、费用以及任何已注册的扩展数据。 请注意,这些数据应被视为不可变的(不应修改),否则会导致应用程序出现错误。 |
|
||
| `checkoutStatus` | 包含 `isCalculating`, `isComplete`, `isIdle`, `isProcessing` 属性的对象 | 以各种布尔状态暴露的当前结账状态。 |
|
||
| `components` | 包含 `ValidationInputError`, `PaymentMethodLabel`, `PaymentMethodIcons`, `LoadingMask` 属性的对象 | 暴露 React 组件,这些组件可以由您的付款方式用于各种常见的付款方式界面元素。 |
|
||
| `emitResponse` | 包含 `noticeContexts` 和 `responseTypes` 属性的对象 | 包含一些常量,在事件发射器中使用时可能很有用。 请阅读 _[事件发射](https://github.com/woocommerce/woocommerce-gutenberg-products-block/blob/e267cd96a4329a4eeef816b2ef627e113ebb72a5/docs/extensibility/checkout-flow-and-events.md#emitting-events)_ 部分以获取更多详细信息。 |
|
||
| `eventRegistration` | 包含 `onCheckoutValidation`, `onCheckoutSuccess`, `onCheckoutFail`, `onPaymentSetup`, `onShippingRateSuccess`, `onShippingRateFail`, `onShippingRateSelectSuccess`, `onShippingRateSelectFail` 属性的对象 | 包含所有结账事件发射器注册函数。 这些是付款方式可以注册观察者以与结账流程的各个阶段进行交互的函数(请参阅 [此文档](docs/block-development/extensible-blocks/cart-and-checkout-blocks/checkout-payment-methods/checkout-flow-and-events) 以获取更多信息)。 |
|
||
| `onClick` | Function | **提供给表达付款方式**,当付款方式按钮被点击时触发(这将向结账发出信号,表明付款方式已接管付款处理)。 |
|
||
| `onClose` | Function | **提供给表达付款方式**,当快速付款方式模态框关闭并控制权返回到结账时触发。 |
|
||
| `onSubmit` | Function | 提交结账并开始处理。 |
|
||
| `validate` | Function | 异步函数,用于在不提交的情况下验证结账表单。 返回一个解析为 `{ hasError: boolean }` 的 Promise。 当您需要在显示付款方式之前进行验证时,此功能很有用。 |
|
||
| `buttonAttributes` | 包含 `height`, `borderRadius` 属性的对象 | 由商家设置的样式,所有快速付款方式按钮都应遵守这些样式。 |
|
||
| `paymentStatus` | Object | 各种付款状态辅助函数。 请注意,您的付款方式不必在客户端设置此状态。 结账将通过您的付款方式从注册到 [结账事件发射器](docs/block-development/extensible-blocks/cart-and-checkout-blocks/checkout-payment-methods/checkout-flow-and-events) 的回复来处理此操作。 |
|
||
| `paymentStatus.isPristine` | Boolean | 当当前付款状态为 `PRISTINE` 时,此值为 true。 |
|
||
| `paymentStatus.isStarted` | Boolean | 当当前付款状态为 `EXPRESS_STARTED` 时,此值为 true。 |
|
||
| `paymentStatus.isProcessing` | Boolean | 当当前付款状态为 `PROCESSING` 时,此值为 true。 |
|
||
| `paymentStatus.isFinished` | Boolean | 当当前付款状态为 `ERROR`, `FAILED` 或 `SUCCESS` 中的任何一个时,此值为 true。 |
|
||
| `paymentStatus.hasError` | Boolean | 当当前付款状态为 `ERROR` 时,此值为 true。 |
|
||
| `paymentStatus.hasFailed` | Boolean | 当当前付款状态为 `FAILED` 时,此值为 true。 |
|
||
| `paymentStatus.isSuccessful` | Boolean | 当当前付款状态为 `SUCCESS` 时,此值为 true。 |
|
||
| `setExpressPaymentError` | Function | 接收一个字符串,允许快速付款方式在需要时为快速付款区域设置错误通知。 这可能是必要的,因为某些快速付款方式的处理可能发生在结账事件之外。 |
|
||
| `shippingData` | 包含 `shippingRates`, `shippingRatesLoading`, `selectedRates`, `setSelectedRates`, `isSelectingRate`, `shippingAddress`, `setShippingAddress`, `needsShipping` 属性的对象 | 包含所有与运输相关的数据(不包括运输状态)。 |
|
||
| `shippingStatus` | 包含 `shippingErrorStatus`, `shippingErrorTypes` 属性的对象 | 各种运输状态辅助函数。 |
|
||
| `shouldSavePayment` | Boolean | 指示购物者是否选择保存其付款方式详细信息(适用于支持保存付款方式的付款方式)。 如果已选择,则为 true;否则为 false。 默认为 false。 |
|
||
|
||
任何已**注册**的 `savedTokenComponent` 节点也会接收一个 `token` 属性,该属性**包含**所**选择**的已**保存**令牌的 ID,以备您的支付**方法**需要将其用于某些内部逻辑。但是,请记住,这只是代表该令牌在**数据库**中的 ID(以及**购物**者**选中**的单选框的值),而不是实际的客户支付令牌(因为通常在**服务器**上进行处理以确保安全)。
|
||
|
||
## 服务器端集成
|
||
|
||
对于服务器端集成,您需要创建一个类,该类需要继承 `Automattic\WooCommerce\Blocks\Payments\Integrations\AbstractPaymentMethodType` 类。
|
||
|
||
这个类是您付款方式的服务器端表示。它用于在正确的时间,将您的付款方式资源注册到商店 API 和结账模块。它与您需要单独实现的 [支付网关 API](/features/payments/payment-gateway-api) 不同,后者用于处理支付。
|
||
|
||
### 示例支付方式集成类
|
||
|
||
```php
|
||
<?php
|
||
namespace MyPlugin\MyPaymentMethod;
|
||
|
||
use Automattic\WooCommerce\Blocks\Payments\Integrations\AbstractPaymentMethodType;
|
||
|
||
final class MyPaymentMethodType extends AbstractPaymentMethodType {
|
||
/**
|
||
* 此属性是一个字符串,用于引用您的支付方式。 重要的是要使用与客户端 JavaScript 支付方式注册中相同的名称。
|
||
*
|
||
* @var string
|
||
*/
|
||
protected $name = 'my_payment_method';
|
||
|
||
/**
|
||
* 初始化支付方式。
|
||
*
|
||
* 此函数将在服务器端初始化过程中被调用,并且是放置任何设置等内容的理想位置。 基本上,您需要做任何事情来初始化您的网关。
|
||
*
|
||
* 请注意,此函数将在每个请求中被调用,因此请不要在此处放置任何耗时操作。
|
||
*/
|
||
public function initialize() {
|
||
$this->settings = get_option( 'woocommerce_my_payment_method_settings', [] );
|
||
}
|
||
|
||
/**
|
||
* 此函数应返回支付方式是否处于活动状态。
|
||
*
|
||
* 如果为 false,则不会加载脚本。
|
||
*
|
||
* @return boolean
|
||
*/
|
||
public function is_active() {
|
||
return filter_var( $this->get_setting( 'enabled', false ), FILTER_VALIDATE_BOOLEAN );
|
||
}
|
||
|
||
/**
|
||
* 返回一个要注册的脚本/句柄的数组,用于此支付方式。
|
||
*
|
||
* 在此函数中,您应该注册您的支付方式脚本(使用 `wp_register_script`),然后返回您注册的脚本句柄。 这将用于将您的支付方式作为结账脚本的依赖项,从而确保正确加载它。
|
||
*
|
||
* 请注意,您仍然应该确保您的脚本具有的其他任何资源依赖项都已在此处正确注册。 如果您使用 Webpack 构建资源,您可能希望使用 WooCommerce Webpack 依赖项提取插件
|
||
* (https://www.npmjs.com/package/@woocommerce/dependency-extraction-webpack-plugin) 来使此过程更容易。
|
||
*
|
||
* @return array
|
||
*/
|
||
public function get_payment_method_script_handles() {
|
||
wp_register_script(
|
||
'my-payment-method',
|
||
'path/to/your/script/my-payment-method.js',
|
||
[],
|
||
'1.0.0',
|
||
true
|
||
);
|
||
return [ 'my-payment-method' ];
|
||
}
|
||
|
||
/**
|
||
* 返回一个要为管理后台排队的脚本句柄的数组。
|
||
*
|
||
* 如果您的支付方式有一个脚本,您_只想_在结账块的编辑器上下文加载,则包含此脚本。
|
||
* 将 `get_payment_method_script_handles` 中的任何脚本也包含在此处,如果它们也需要在管理后台加载。
|
||
*/
|
||
public function get_payment_method_script_handles_for_admin() {
|
||
return $this->get_payment_method_script_handles();
|
||
}
|
||
```
|
||
|
||
```
|
||
/**
|
||
* 返回一个键值对数组,这些数据可供付款方式脚本客户端使用。
|
||
*
|
||
* 这些数据可以通过 `wc.wcSettings.getSetting` 在客户端访问。例如,如果您将 `stripe` 赋值为该类的 `name` 属性,则可以在客户端通过以下方式访问任何数据:
|
||
* `wc.wcSettings.getSetting( 'stripe_data' )`。这将返回一个对象,其形状与您从此函数返回的关联数组匹配。
|
||
*
|
||
* @return array
|
||
*/
|
||
public function get_payment_method_data() {
|
||
return [
|
||
'title' => $this->get_setting( 'title' ),
|
||
'description' => $this->get_setting( 'description' ),
|
||
'supports' => $this->get_supported_features(),
|
||
];
|
||
}
|
||
}
|
||
```
|
||
|
||
# 文档
|
||
|
||
这是一个示例文档,其中包含一些常用的术语。
|
||
|
||
## 设置
|
||
|
||
* **Settings** → **设置**
|
||
* **Payment methods** → **付款方式**
|
||
* **Available** → **可用**
|
||
* **Property** → **属性**
|
||
* **Method** → **方法**
|
||
* **Access** → **访问**
|
||
* **Title** → **标题**
|
||
* **Value** → **价值**
|
||
* **Shape** → **形状**
|
||
* **Class** → **类**
|
||
* **Data** → **数据**
|
||
* **Port** → **端口**
|
||
* **Via** → **通过**
|
||
* **Key** → **关键字**
|
||
* **For** → **为**
|
||
* **Tan** → **褐色**
|
||
* **Cc** → **抄送**
|
||
* **In** → **在**
|
||
* **Description** → **描述**
|
||
* **Assigned** → **已分配**
|
||
|
||
## 示例
|
||
|
||
这是一个示例段落,演示如何使用上述术语。
|
||
|
||
例如,您可以在 **设置** 中配置 **付款方式**。每个 **付款方式** 都有自己的 **属性** 和 **方法**。您可以通过 **访问** 相应的 **端口** 来获取 **数据**。
|
||
|
||
## 列表
|
||
|
||
以下是一个列表,其中包含一些常用的命令:
|
||
|
||
* `command1`
|
||
* `command2`
|
||
* `command3`
|
||
|
||
## 代码示例
|
||
|
||
以下是一个代码示例,演示如何使用 `get_payment_method_data` 函数:
|
||
|
||
```
|
||
/**
|
||
* Returns an array of key=>value pairs of data made available to the payment methods script client side.
|
||
*
|
||
* This data will be available client side via `wc.wcSettings.getSetting`. So for instance if you assigned `stripe` as the
|
||
* value of the `name` property for this class, client side you can access any data via:
|
||
* `wc.wcSettings.getSetting( 'stripe_data' )`. That would return an object matching the shape of the associative array
|
||
* you returned from this function.
|
||
*
|
||
* @return array
|
||
*/
|
||
public function get_payment_method_data() {
|
||
return [
|
||
'title' => $this->get_setting( 'title' ),
|
||
'description' => $this->get_setting( 'description' ),
|
||
'supports' => $this->get_supported_features(),
|
||
];
|
||
}
|
||
}
|
||
```
|
||
|
||
## 占位符和 HTML 标签
|
||
|
||
以下是一个包含占位符和 HTML 标签的示例:
|
||
|
||
`This is a string with a placeholder: %s`.
|
||
|
||
`<p>This is a paragraph.</p>`
|
||
|
||
## URL 链接
|
||
|
||
以下是一个 URL 链接:
|
||
|
||
[example.com](https://example.com)
|
||
|
||
## 函数名、变量名、命令名
|
||
|
||
函数名、变量名和命令名应保持英文原文。例如:`MyFunction`, `myVariable`, `myCommand`.
|
||
```
|
||
|
||
### 注册付款方式集成
|
||
|
||
在创建了继承 `Automattic\WooCommerce\Blocks\Payments\Integrations\AbstractPaymentMethodType` 的类后,您需要将其注册到服务器端的付款方式处理中。
|
||
|
||
您可以通过使用 `PaymentMethodRegistry` 类上的 `register` 方法来实现。
|
||
|
||
```php
|
||
use MyPlugin\MyPaymentMethod\MyPaymentMethodType;
|
||
use Automattic\WooCommerce\Blocks\Payments\PaymentMethodRegistry;
|
||
|
||
add_action(
|
||
'woocommerce_blocks_payment_method_type_registration',
|
||
function( PaymentMethodRegistry $payment_method_registry ) {
|
||
$payment_method_registry->register( new MyPaymentMethodType() );
|
||
}
|
||
);
|
||
```
|
||
|
||
## 处理支付(旧版支持)
|
||
|
||
支付仍通过[支付网关 API](/features/payments/payment-gateway-api) 处理。这是一个独立于上述付款方式集成所使用的 API。
|
||
|
||
结账区块将客户端脚本提供的 `payment_data` 转换为 `$_POST` 并调用支付网关的 `process_payment` 方法。
|
||
|
||
_如果您已有一个与短代码结账流程集成的 WooCommerce 支付方法扩展,旧版处理机制将在服务器端为您处理支付。_
|
||
|
||
## 通过商店 API 处理支付
|
||
|
||
在某些更高级的场景下,之前提到的旧版支付处理方式可能无法满足您现有的支付方式集成需求。对于这些情况,还提供了一个动作钩子,您可以使用它来处理服务器端的订单处理,它提供了更多的上下文信息,并且专用于商店 API。
|
||
|
||
这个钩子是集成支付处理的首选位置:
|
||
|
||
```php
|
||
do_action_ref_array( 'woocommerce_rest_checkout_process_payment_with_context', [ $context, &$result ] );
|
||
```
|
||
|
||
> 注意:在您之前创建的支付方式类型类的 `initialize` 方法中注册您的回调函数是一个不错的选择。
|
||
|
||
在该钩子上注册的回调函数将接收到:
|
||
|
||
- 一个 `PaymentContext` 对象,其中包含所选的 `payment_method`(这与在注册支付方式时定义的 `paymentMethodId` 值相同),正在创建的 `order`,以及由支付方式客户端提供的任何额外的 `payment_data`。
|
||
- 一个 `PaymentResult` 对象,您可以使用它来通过商店 API 将状态、重定向 URL 以及任何其他支付详情返回给客户端。
|
||
|
||
如果您在提供的 `PaymentResult` 对象上设置了状态,则您的支付方式将不再使用旧版支付处理方式。如果发生错误,您的回调函数可以抛出异常,该异常将由商店 API 处理。
|
||
|
||
以下是一个示例回调函数:
|
||
|
||
```php
|
||
add_action(
|
||
'woocommerce_rest_checkout_process_payment_with_context',
|
||
function( $context, $result ) {
|
||
if ( $context->payment_method === 'my_payment_method' ) {
|
||
// 订单处理逻辑将在此处执行!
|
||
// $context->order 包含订单对象,如果需要
|
||
// ...
|
||
|
||
// 如果上述逻辑成功,我们可以将状态设置为成功。
|
||
$result->set_status( 'success' );
|
||
$result->set_payment_details(
|
||
array_merge(
|
||
$result->payment_details,
|
||
[
|
||
'custom-data' => '12345',
|
||
]
|
||
)
|
||
);
|
||
$result->set_redirect_url( 'some/url/to/redirect/to' );
|
||
}
|
||
},
|
||
10,
|
||
2
|
||
);
|
||
```
|
||
|
||
## 从客户端传递值到服务器端支付处理
|
||
|
||
在这个例子中,我们将从 BACS 支付方法传递一些数据到服务器。BACS 的注册过程大致如下:
|
||
|
||
```js
|
||
// 获取在注册支付方法时提供的设置
|
||
const settings = window.wc.wcSettings.getSetting( 'bacs_data' );
|
||
|
||
// 这是一个组件,当选择 BACS 支付方法时,它将在结账块中渲染
|
||
const Content = () => {
|
||
return decodeEntities( settings?.description || '' );
|
||
};
|
||
|
||
// 这是一个支付方法的标签
|
||
const Label = ( props ) => {
|
||
const { PaymentMethodLabel } = props.components;
|
||
return <PaymentMethodLabel text={ decodeEntities( settings?.title || 'BACS' ) } />;
|
||
};
|
||
|
||
// 注册支付方法
|
||
const bankTransferPaymentMethod = {
|
||
name: 'BACS',
|
||
label: <Label />,
|
||
content: <Content />,
|
||
edit: <Content />,
|
||
canMakePayment: () => true,
|
||
supports: {
|
||
features: settings?.supports ?? [],
|
||
},
|
||
};
|
||
```
|
||
|
||
支付方法节点会传递所有数据,这些数据来自 [usePaymentMethodInterface 钩子](https://github.com/woocommerce/woocommerce-blocks/blob/trunk/docs/internal-developers/block-client-apis/checkout/checkout-api.md#usepaymentmethodinterface)。因此,我们可以在我们的 `<Content />` 组件中使用它,如下所示:
|
||
|
||
```js
|
||
const Content = ( props ) => {
|
||
const { eventRegistration, emitResponse } = props;
|
||
const { onPaymentProcessing } = eventRegistration;
|
||
useEffect( () => {
|
||
const unsubscribe = onPaymentProcessing( async () => {
|
||
// 可以在这里执行任何需要的处理,然后发出响应。
|
||
// 例如,我们可以验证一个自定义字段,或者执行一个 AJAX 请求,然后发出一个响应,指示其是否有效。
|
||
const myGatewayCustomData = '12345';
|
||
const customDataIsValid = !! myGatewayCustomData.length;
|
||
|
||
if ( customDataIsValid ) {
|
||
return {
|
||
type: emitResponse.responseTypes.SUCCESS,
|
||
meta: {
|
||
paymentMethodData: {
|
||
myGatewayCustomData,
|
||
},
|
||
},
|
||
};
|
||
}
|
||
|
||
return {
|
||
type: emitResponse.responseTypes.ERROR,
|
||
message: 'There was an error',
|
||
};
|
||
} );
|
||
// 当此组件卸载时,取消订阅。
|
||
return () => {
|
||
unsubscribe();
|
||
};
|
||
}, [
|
||
emitResponse.responseTypes.ERROR,
|
||
emitResponse.responseTypes.SUCCESS,
|
||
onPaymentProcessing,
|
||
] );
|
||
return decodeEntities( settings.description || '' );
|
||
};
|
||
```
|
||
|
||
现在,当一个订单被创建时,如果查看 API 请求的负载,我们可以看到以下 JSON:
|
||
|
||
```json
|
||
{
|
||
"shipping_address": {},
|
||
"billing_address": {},
|
||
"customer_note": "",
|
||
"create_account": false,
|
||
"payment_method": "bacs",
|
||
"payment_data": [
|
||
{
|
||
"key": "myGatewayCustomData",
|
||
"value": "12345"
|
||
}
|
||
],
|
||
"extensions": {}
|
||
}
|
||
```
|
||
|
||
一个回调函数 `woocommerce_rest_checkout_process_payment_with_context` 可以访问这些数据,并将其用于处理支付。
|
||
|
||
# WooCommerce REST API 结账处理流程
|
||
|
||
本文档描述了使用 WooCommerce REST API 进行结账处理的流程。
|
||
|
||
## 结账流程
|
||
|
||
1. 用户在前端通过 REST API 发起结账请求。
|
||
2. 服务器接收到请求,并验证用户输入的数据。
|
||
3. 服务器调用相应的 `Method` 处理支付。
|
||
4. 服务器将 `Result` 返回给前端。
|
||
|
||
## 详细步骤
|
||
|
||
以下是一个示例,展示了如何使用 `add_action` 钩子来处理 `Context` 中的自定义数据。
|
||
|
||
```php
|
||
add_action( 'woocommerce_rest_checkout_process_payment_with_context', function( $context, $result ) {
|
||
if ( $context->payment_method === 'bacs' ) {
|
||
$myGatewayCustomData = $context->payment_data['myGatewayCustomData'];
|
||
// 这里我们会使用 $myGatewayCustomData 来处理支付
|
||
}
|
||
} )
|
||
```
|
||
|
||
**说明:**
|
||
|
||
* `woocommerce_rest_checkout_process_payment_with_context`:一个 `Action` 钩子,允许在处理结账支付时访问 `Context` 对象。
|
||
* `$context`:包含用户输入的数据和支付信息的 `Context` 对象。
|
||
* `$result`:包含支付 `Result` 的对象。
|
||
* `payment_method`:支付 `Method` 的名称。
|
||
* `myGatewayCustomData`:一个 `Custom` 字段,用于存储自定义数据。
|
||
|
||
## 错误处理
|
||
|
||
如果在 `结账` 过程中发生错误,服务器应返回一个错误信息给前端。
|
||
|
||
## 安全性
|
||
|
||
请确保对所有用户输入的数据进行验证和过滤,以防止安全漏洞。
|
||
|
||
## 示例
|
||
|
||
以下是一个使用 REST API 进行 `支付` 的示例:
|
||
|
||
```
|
||
POST /wp-json/wc/v3/orders
|
||
|
||
{
|
||
"payment_method": {
|
||
"method": "bacs",
|
||
"myGatewayCustomData": "some custom data"
|
||
}
|
||
}
|
||
```
|
||
|
||
**注意:**
|
||
|
||
* 请根据实际情况修改代码。
|
||
* 请参考 WooCommerce 文档了解更多信息。
|
||
* `Pro` 版本可能包含更多功能。
|
||
|
||
## 术语表
|
||
|
||
| 英文术语 | 中文术语 |
|
||
|---|---|
|
||
| Checkout | 结账 |
|
||
| Gateway | 网关 |
|
||
| Context | 上下文 |
|
||
| Method | 方法 |
|
||
| check | 检查 |
|
||
| Data | 数据 |
|
||
| Use | 使用 |
|
||
| Result | 结果 |
|
||
| Custom | 自定义 |
|
||
| Action | 操作 |
|
||
| Text | 文本 |
|
||
| here | 这里 |
|
||
| Pro | 专业版 |
|
||
| Pay | 支付 |
|
||
| on | 开 |
|
||
| at | 在 |
|
||
| mm | mm |
|
||
| Th | 星期四 |
|
||
| Su | 星期日 |
|
||
| We | 周三 | |