db7bd92536
- Split Installation and Activation process.
- Add info about installing BuddyPress from the Network admin to the existing installation guide (renamed from `activate-buddypres.md` to `install.md`).
- Create a page to explain regular site Activation.
- Create a page to explain 3 possible options about Multisite Activation.
- Add some screenshots.

Props vapvarun
Closes https://github.com/buddypress/buddypress/pull/275


git-svn-id: https://buddypress.svn.wordpress.org/trunk@13863 cdf35c40-ae34-48e0-9cc9-0c9da1808c22
3.3 KiB
BuddyPress Installation Guide for Website Administrators
Welcome to the BuddyPress installation guide! BuddyPress is a versatile plugin that enriches your WordPress site with a community environment for your family, friends, colleagues, teammates, customers, in short the people you want to be in touch with. This guide will walk you through installing BuddyPress on your WordPress site. Before you begin, please ensure that your server meets BuddyPress's minimum requirements and that your WordPress version is compatible.
Prerequisites
Please ensure your WordPress installation is current and compatible with the BuddyPress plugin. A good way to quickly find this information is to check the plugin's official page on the WordPress Plugin Directory and look for the required WordPress Version as well as the required PHP Version. These informations are also available at the top of the readme.txt file that is include in the plugin's package.
Automated Installation Procedure
Step 1: Confirm WordPress Installation
Please confirm that WordPress is installed on your hosting environment. If WordPress still needs to be installed, please download and install it from the official WordPress website.
Step 2: Install BuddyPress
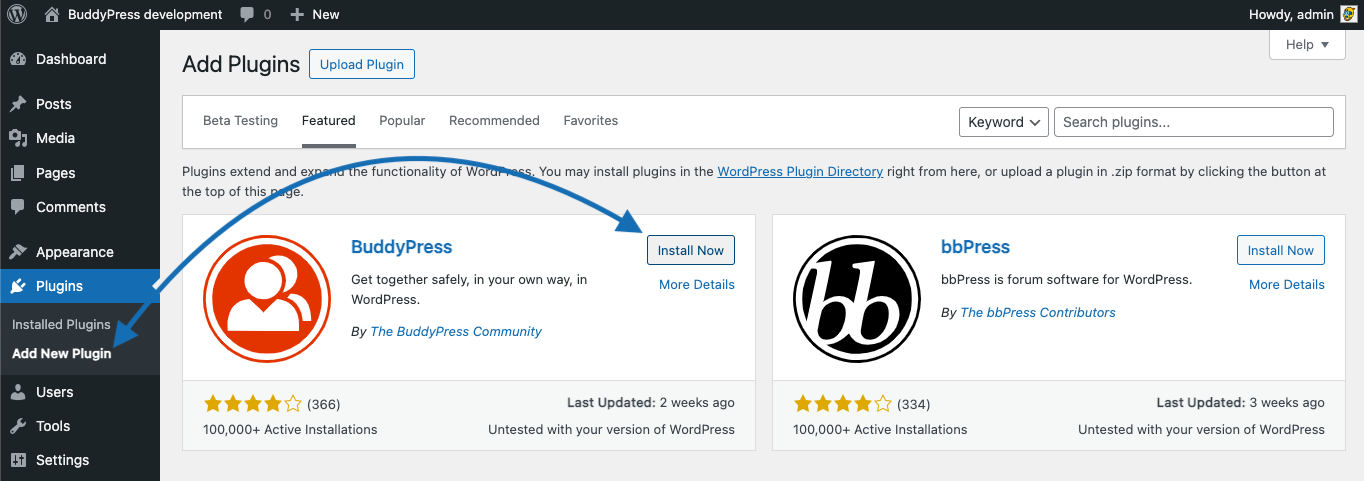
Access your WordPress administrative panel and navigate to Plugins → Add New. You can either activate the "Featured" tab and scroll down to find it or use the search field to look for BuddyPress. Click on Install Now blue button of the BuddyPress plugin card.
Note
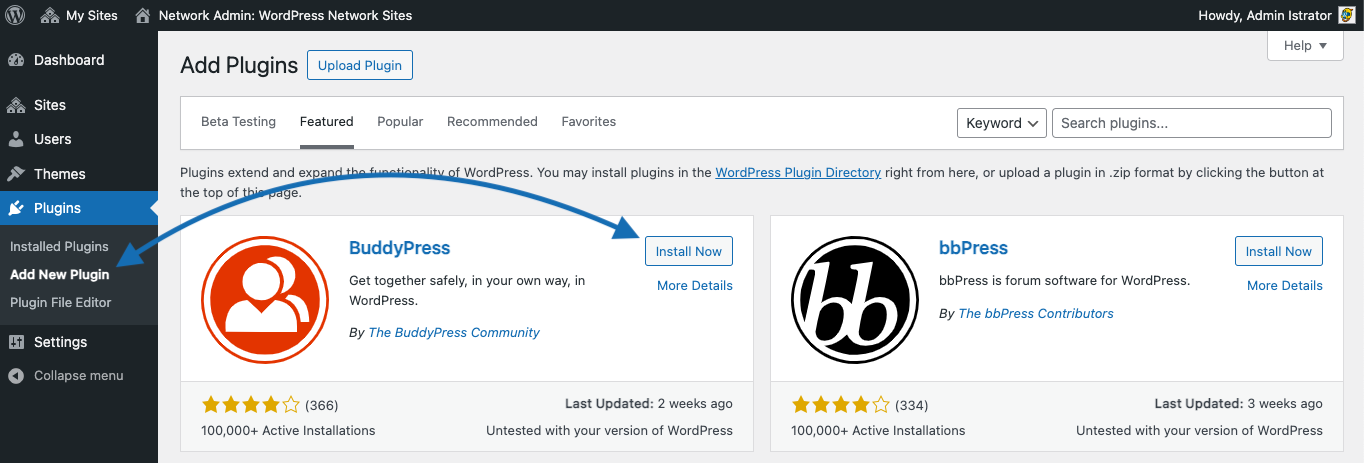
If you are using a WordPress multisite config, BuddyPress installation happens into the Network administrative panel, inside the
Plugins → Add Newnetwork admin screen.
Manual Installation Process
For administrators who prefer or require a manual installation approach, please follow these steps:
Step 1: Download BuddyPress
Navigate to the BuddyPress page on the WordPress plugin repository and download the most recent version of the plugin. You'll get a zip Archive having a name looking like this buddypress.VersionNumber.zip.
Step 2: Upload BuddyPress
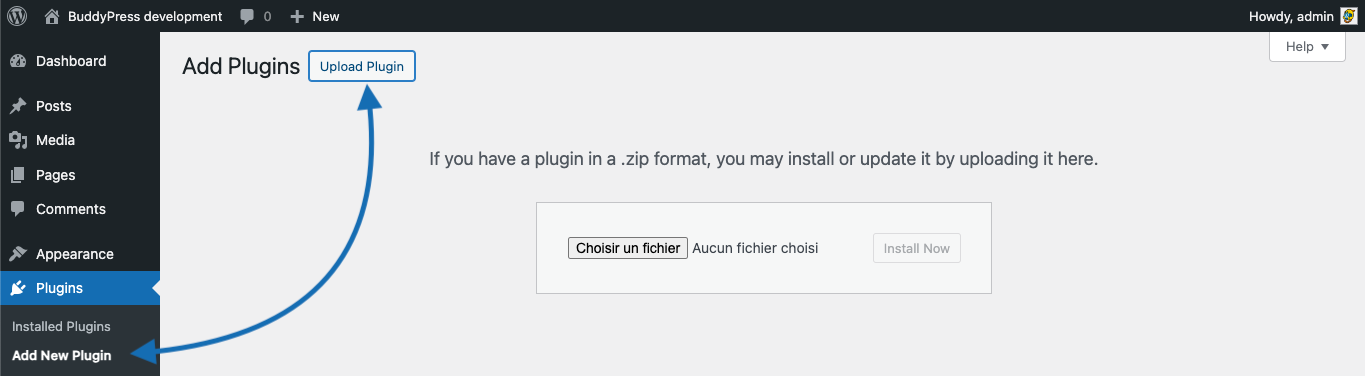
You can alternatively go to the Plugins → Add New administration screen and use the WordPress plugin uploader to transfer the zip Archive you downloaded into your plugins directory or unzip the Archive locally and utilize your preferred FTP client to drop the buddypress plugin folder into the wp-content/plugins directory within your WordPress installation on your web server.
Note
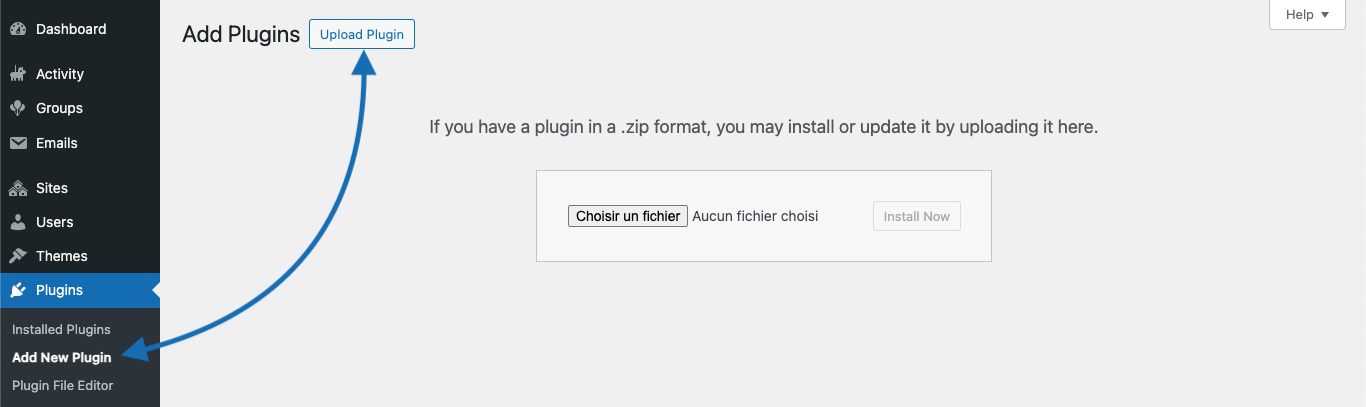
If you are using a WordPress multisite config, BuddyPress installation happens into the Network administrative panel, inside the
Plugins → Add Newnetwork admin screen.
Next step
- Activate BuddyPress on a regular WordPress site, on a multisite WordPress.